Gitlab and Github provide the static website spaces for us. We can upload the static file, such as html, css, js file to the git repository. But if you don’t want to let everyone can download your full static files via git directly on Github. You must pay for this private repository feature. But private repository for static pages on Gitlab is free.
Create Gitlab Pages directory
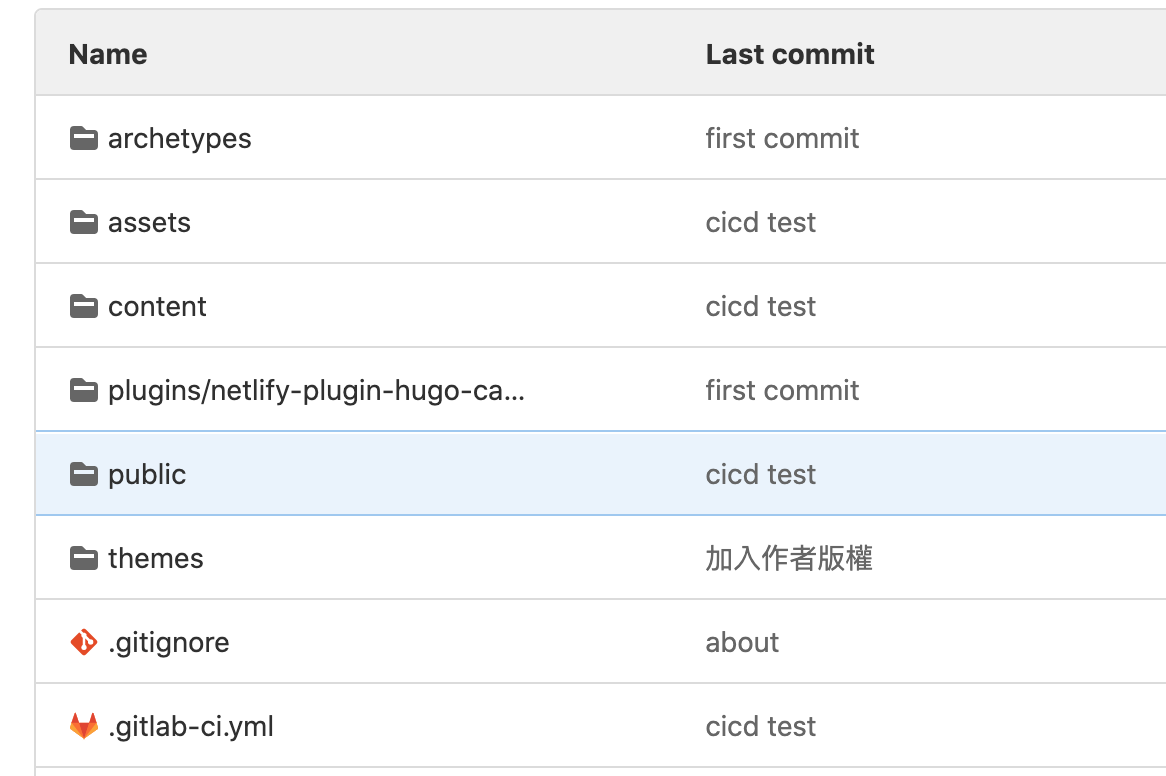
You can create public directory on your gitlab repository. And put all your static file on this directory. The index.html is the entry point of your Gitlab page.
Setting Gitlab pages deployment
Create the .gitlab-ci.yml file on the root of the git repository. Set artifacts configuration to your public directory, and only deploy your page on main branch.
# .gitlab-ci.yml
image: alpine:latest

pages:
  stage: deploy
  script:
    - echo 'Do nothing'
  # gitlab page directory
  artifacts:
    paths:
      - public
  # only deploy your page on `main` branch.
  only:
    - main
Deploy Gitlab Pages
Add the public directory and .gitlab-ci.yml to your git commit and push your repository to Gitlab. Go to CI/CD > Piplines on GitLab repository setting pages. Then you will see the GitLab Pages deploy CI/CD is processing. When you see the deploy status change to passed means deploy successfully.

View the deployed Gitlab Pages
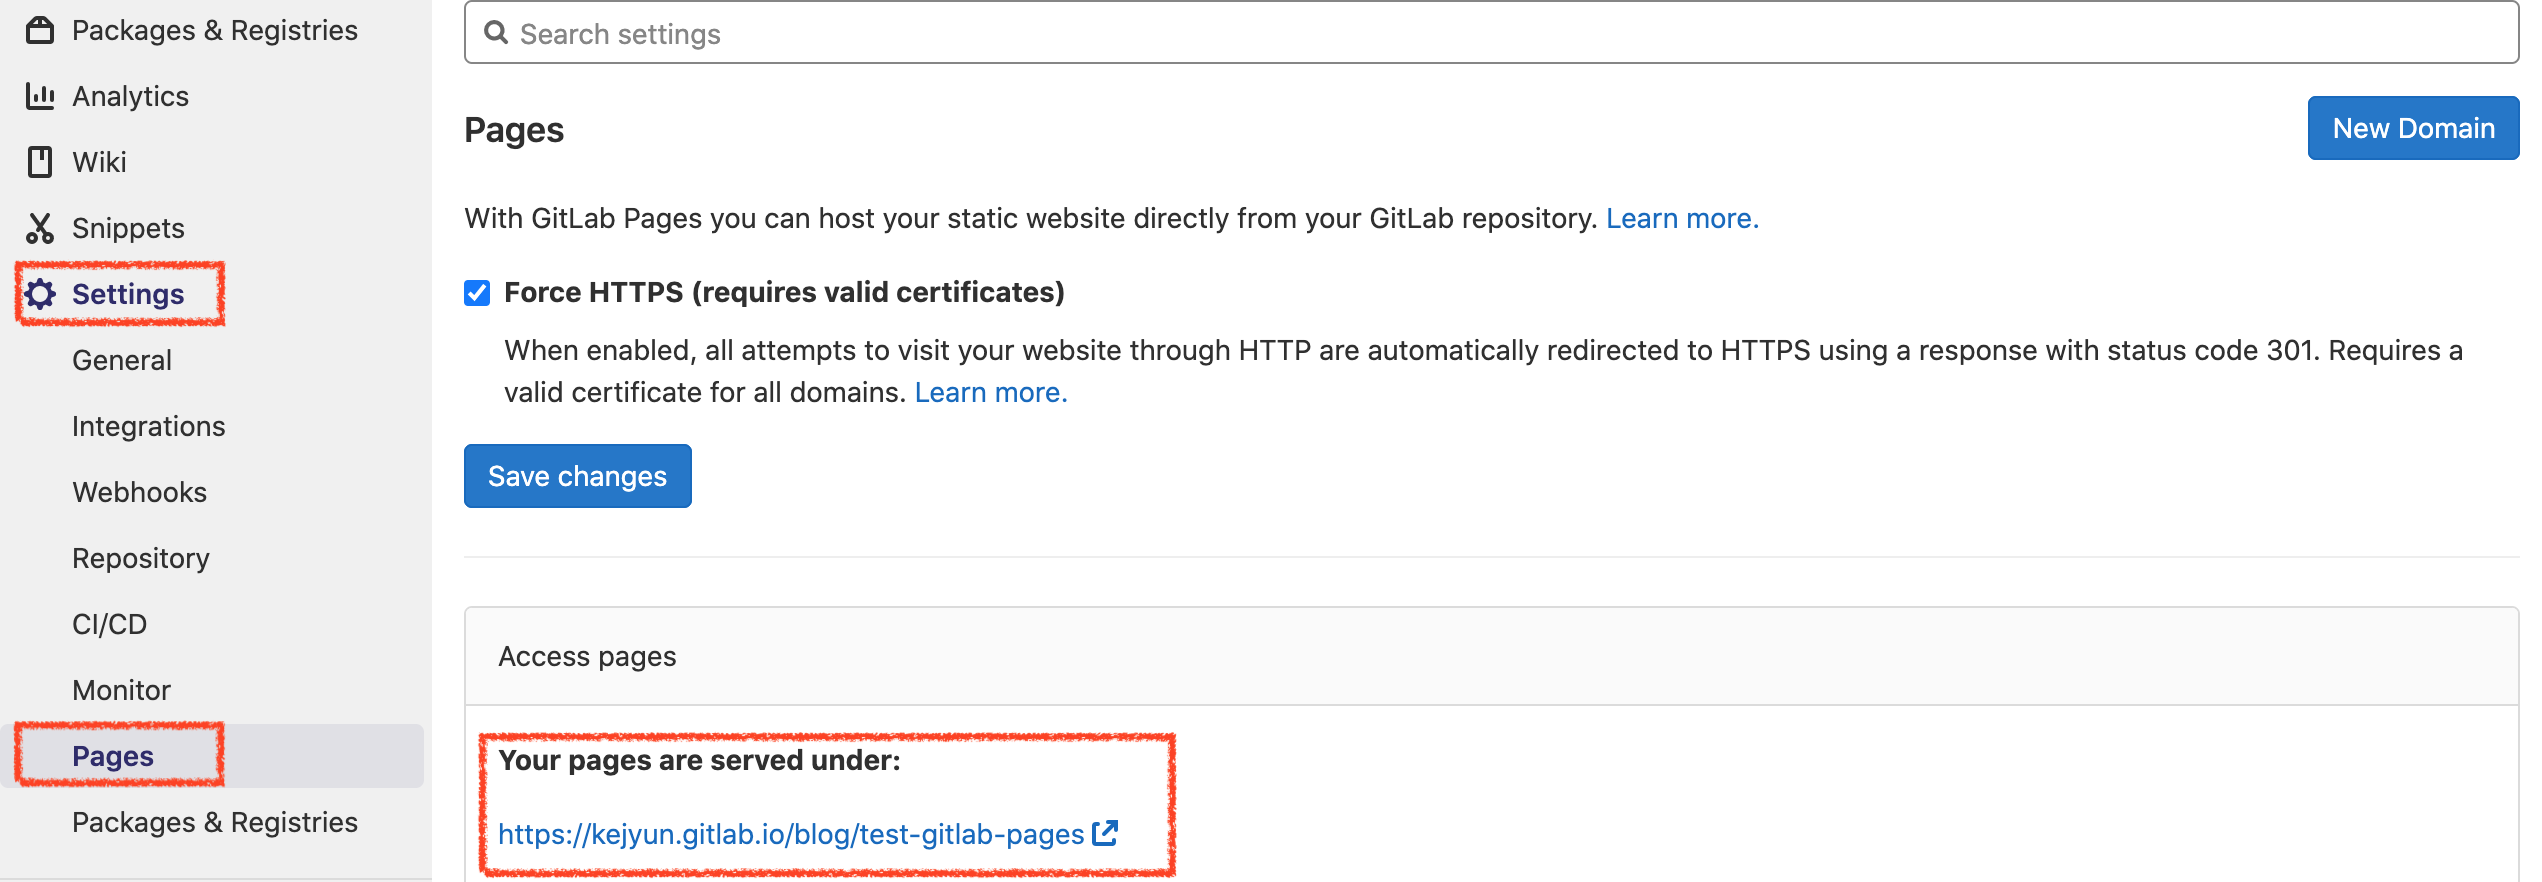
Go to Settings > Pages, then you can see your Gitlab pages URL. The default GitLab pages URL is https://<account>.gitlab.io/<repository-path>. You can see your static websites via this link.
Setting Gitlab Pages access permissions
Gitlab Pages has its access permissions
- Only project member can see your pages
- Everyone can see your pages
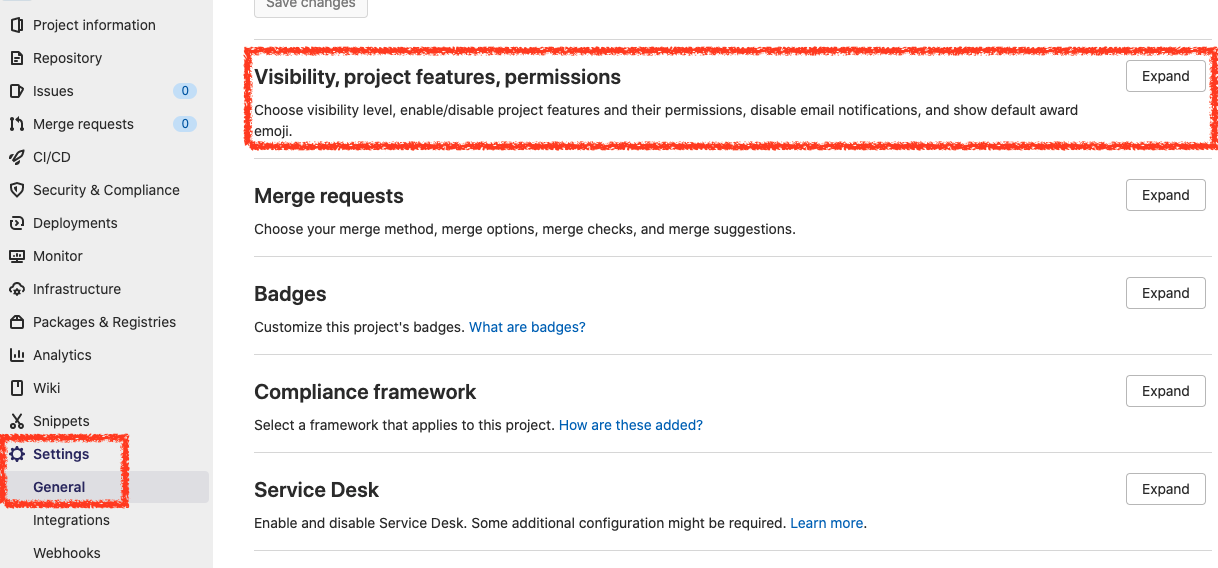
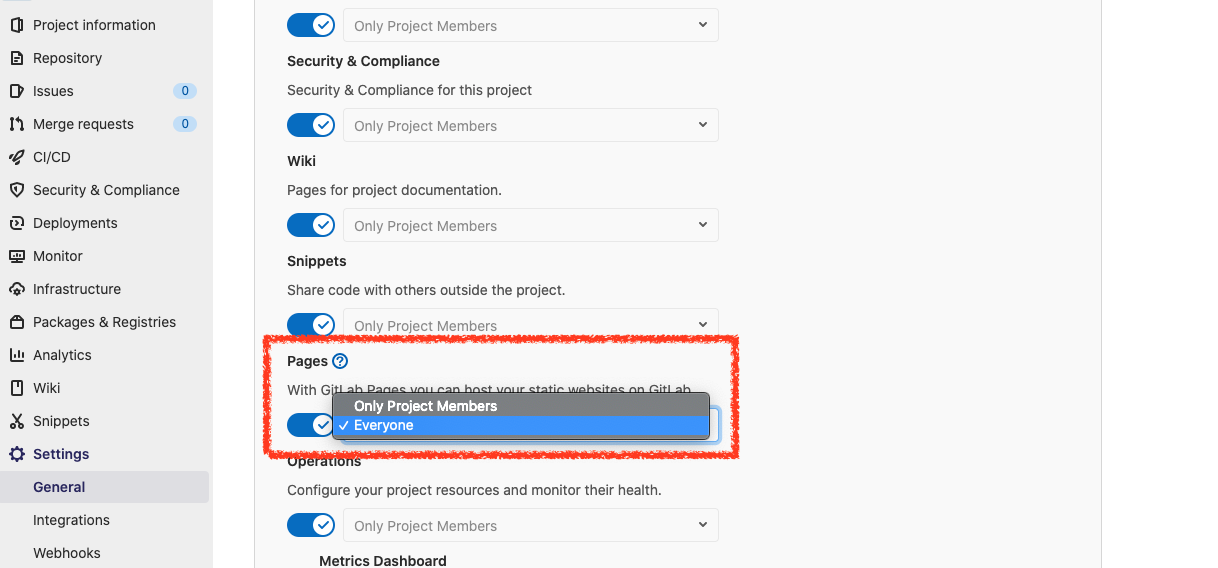
Only project members can see your pages in the Gitlab Pages is the default setting. You can go to Setting > General to change the access permission if you want. Then click Expand button on the Visibility, project features, permissions section.
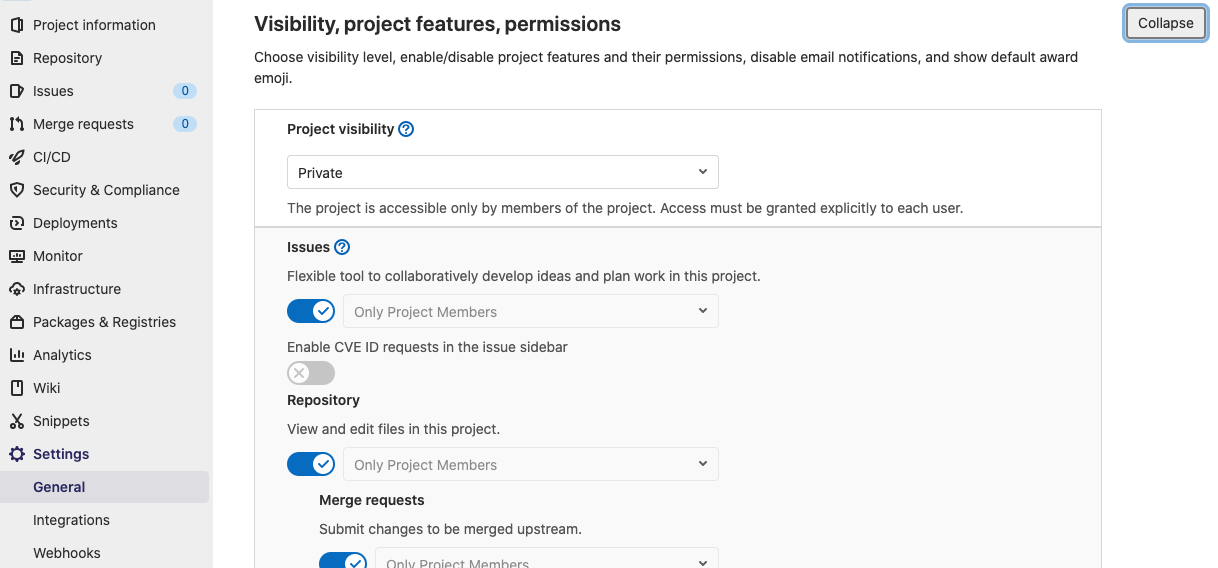
You can find Pages settings below the Visibility, project features, permissions section. Change the access permission as you want. Then save your changes.
- Only Project Members
- Everyone
Now you can publish your Gitlab pages to everyone.
Customize domain and SSL certificate
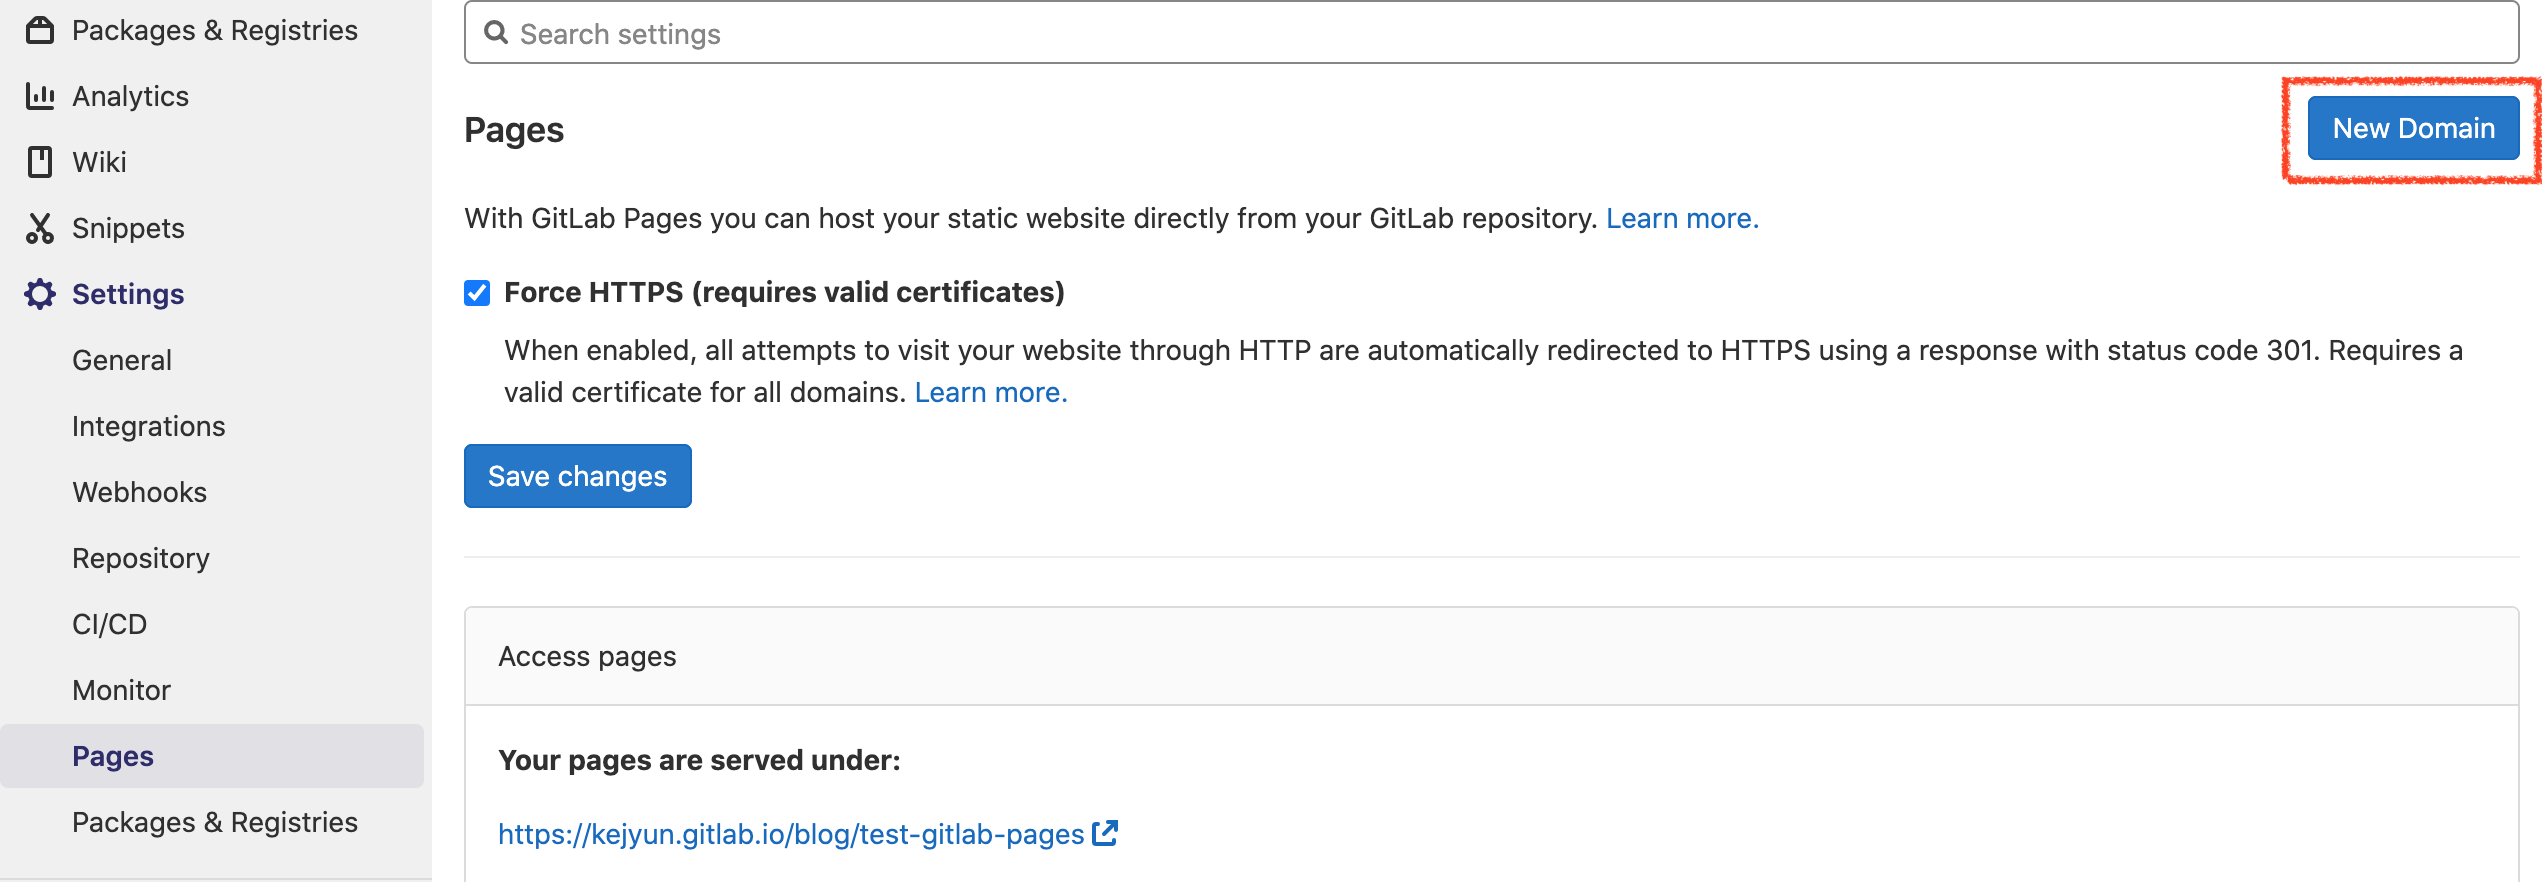
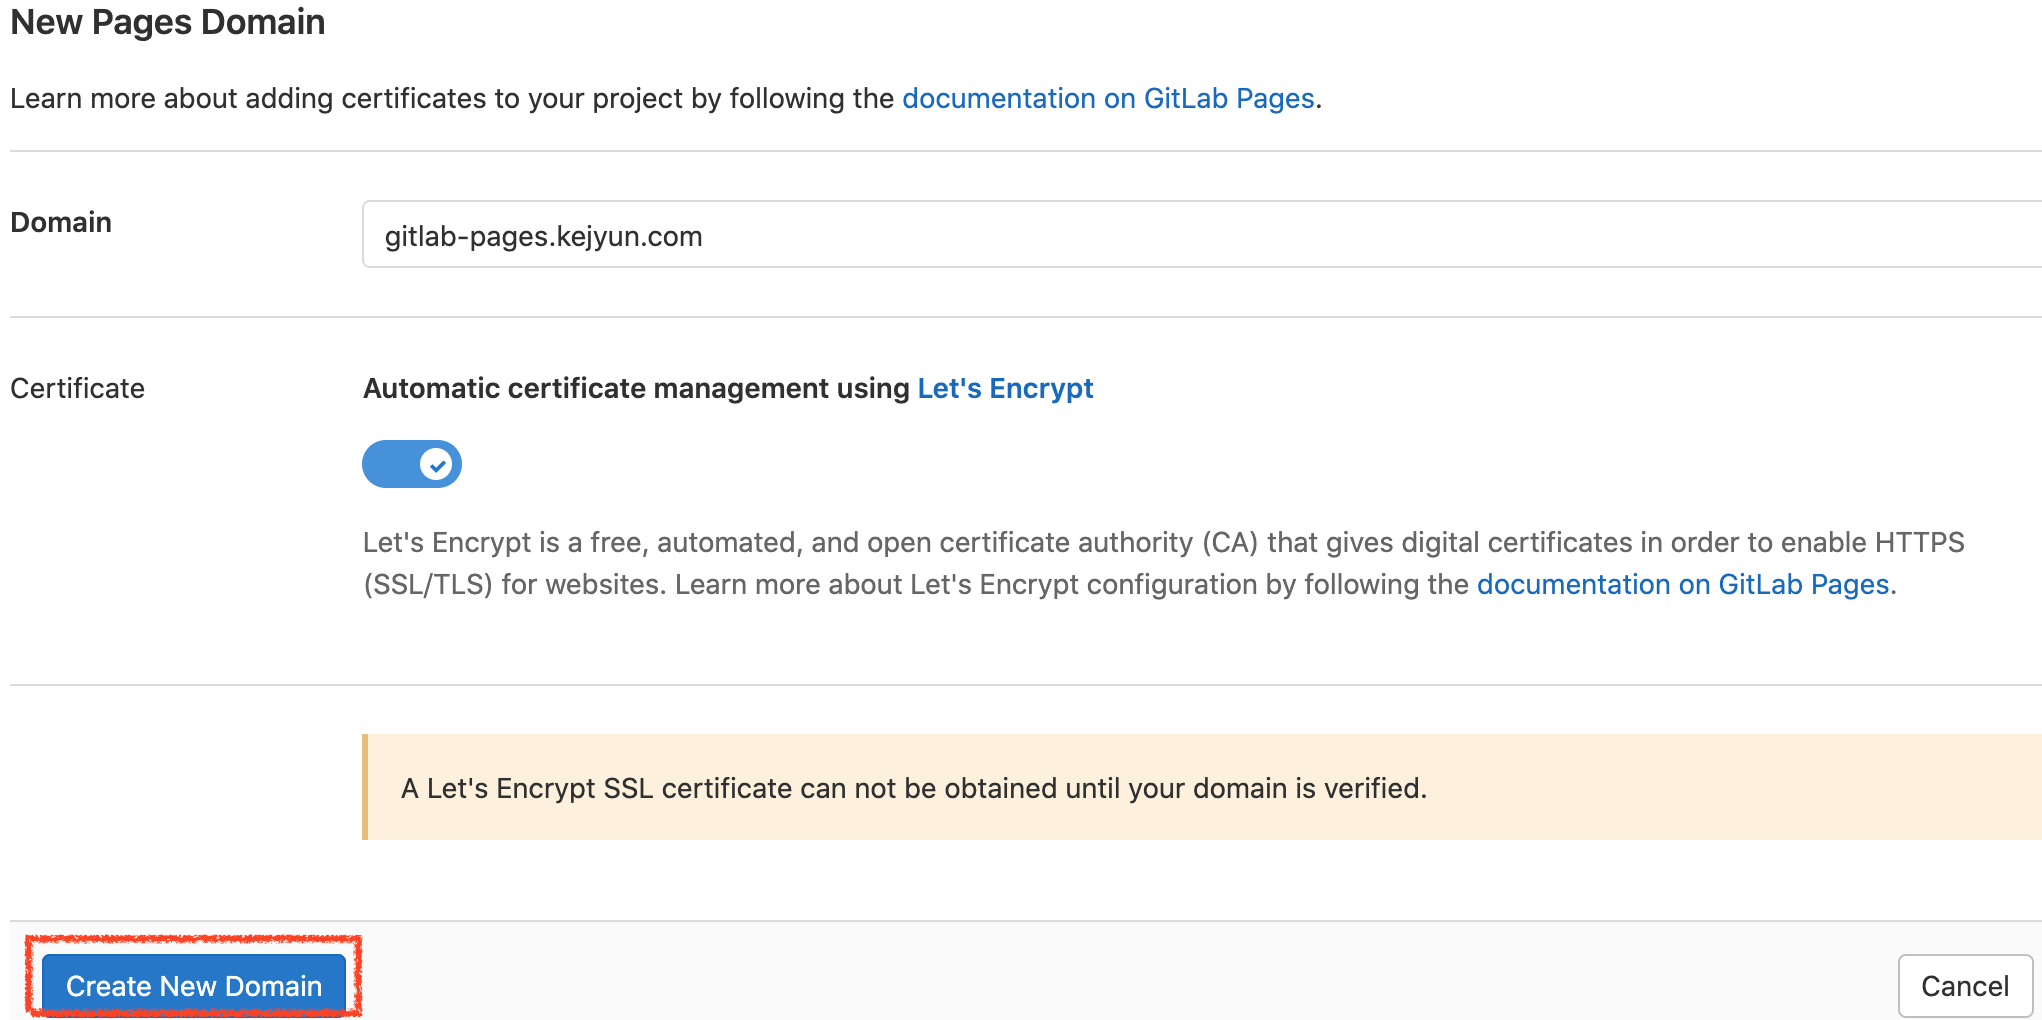
If you want to customize your GitLab Pages domain name, you can click the New Domain button the create the domain. Then type the domain that you want. And let Gitlab using the free SSL certificate by using Let’s Encrypt automatically.
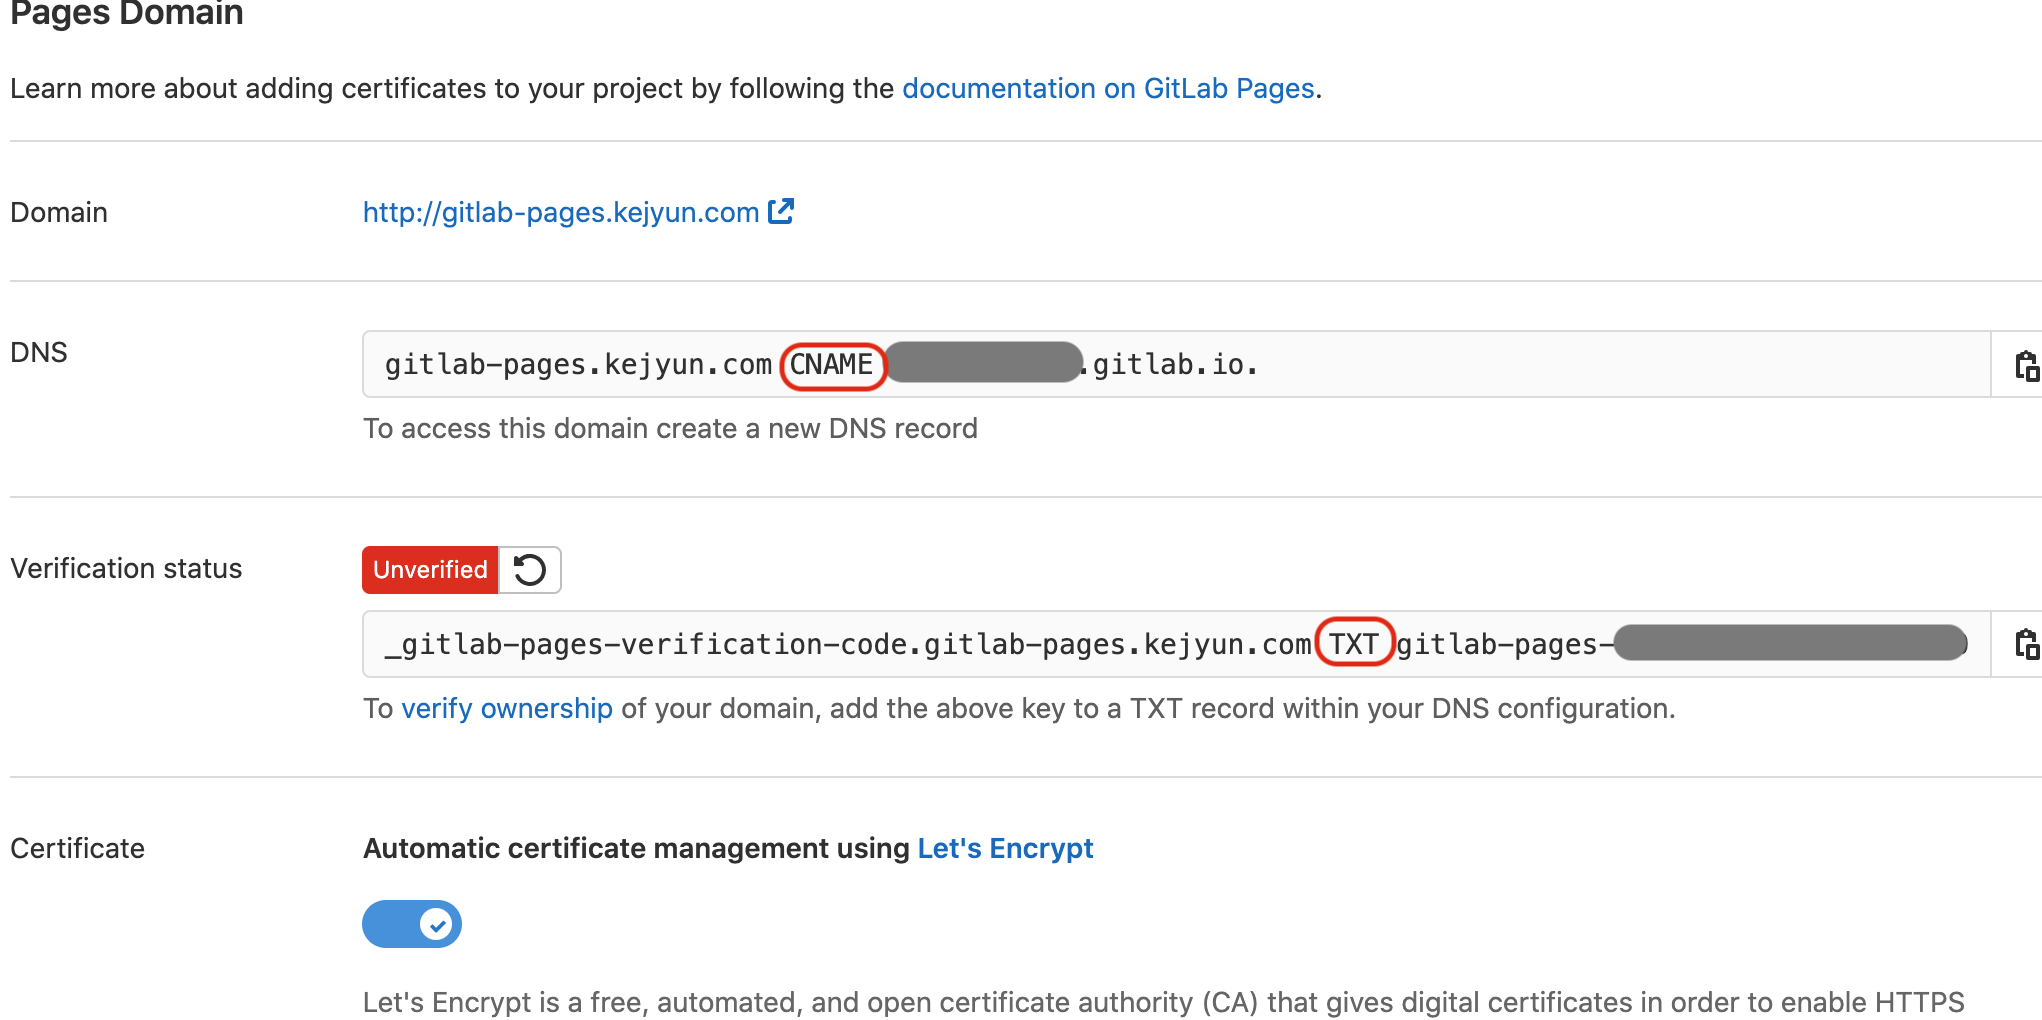
Setting your DNS Setting to your domain after create your domain. Then verify your domain status. You can see your static pages via your custome domain after your domain is verified.
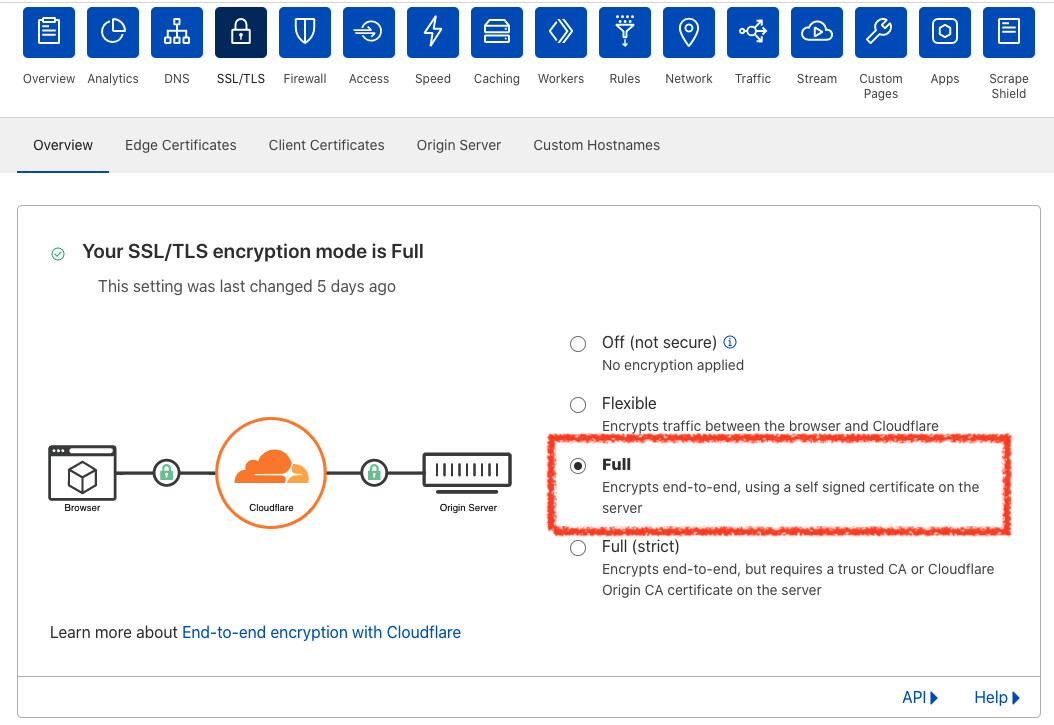
Cloudflare DNS SSL certificate
If you’re using Cloudflare as your DNS management platform. You have to set your SSL encryption mode to full. Then GitLab Page can only get the free SSL certificate after SSL encryption mode is full
Reference
- GitLab Pages | GitLab
- Tutorial: Create a GitLab Pages website from scratch | GitLab
- Exploring GitLab Pages | GitLab
Donate KJ 贊助作者喝咖啡
如果這篇文章對你有幫助的話,可以透過下面支付方式贊助作者喝咖啡,如果有什麼建議或想說的話可以贊助並留言給我
If this article has been helpful to you, you can support the author by treating them to a coffee through the payment options below. If you have any suggestions or comments, feel free to sponsor and leave a message for me!
| 方式 Method | 贊助 Donate |
| PayPal | https://paypal.me/kejyun |
| 綠界 ECPay | https://p.ecpay.com.tw/AC218F1 |
| 歐付寶 OPay | https://payment.opay.tw/Broadcaster/Donate/BD2BD896029F2155041C8C8FAED3A6F8 |
